Explore. Dream. Discover.
Join us on this amazing adventure...
Join us on this amazing adventure...
You’re here for a reason – to start a travel blog in less than an hour or so. You now have something you want to share with a group of people who you know – whether friends or family – or a bunch of people you don’t know. It doesn’t matter whether your target is to earn some money in the short or long term or if you simply want to let some of your knowledge out in word form. But then you started doing some research on Google, Bing or any other search engine and you found a lot of information that almost made you give up.
Don’t worry! We’ve been there, so we know exactly how you might be feeling. If you don’t have one specific online source which walks you step-by-step through the actions you should take to start a travel blog in less than an hour, it can be extremely overwhelming.
We’ve done a lot of research and spent hours reading and trying to learn the best way to go about it, so we hope this article is somehow useful to you. Our intention is to give you all the information you need to start a travel blog in less than an hour, and with a very limited budget. We’ll focus on just five steps.
Once you have your travel blog online, it might be a good idea to test yourself and enrich your online business … Because once you start, if you’re disciplined and you follow some simple steps, this is likely to become your online business and generate enough income to not only offset the costs of creating a travel blog in less than an hour but also give you an extra source of income. In the long run this might become your MAIN source of income and gain you some independence.
As you’re still reading this blog post, you must be seriously considering becoming financially independent in this way in the long run.
If you’ve ever read an article where it said that in order to have a travel blog or any other blog or website you would need to know about coding, SEO, digital platforms, keywords, marketing campaings, and so on, please disregard all that. You really don’t need to have all that knowledge. You’ll learn some of those things as you go along, but there are some things you’ll never need to know about in huge detail, because you’ll be financially independent enough to be able to have someone working for you.
So let’s get to it! Before you start, make sure you have: a computer or laptop, one uninterrupted hour of your time, a quiet place to avoid any distractions, a credit or debit card and a delicious drink.
Then follow the five simple steps below to start a travel blog in less than an hour (or even less!!), and hopefully in a short while you will have a beautiful travel blog and be ready to publish all your stories to share with family, friends and strangers 🙂
As we mentioned above, this is perhaps the part you should spend the most time on before making a final decision to start a travel blog in less than an hour. After all, this will be the name of your travel blog and will be what people will associate with your business. This is what your blog is going to be called, so it is important that you take your time and try to come up with a name that makes sense to your travel blog/business, as well as being short and easy to remember.
Ideally you should go for something that is easy to understand when all the words are together in the domain (everything after “www.”). For instance, if your travel blog is called London Guide (that name is already taken, so don’t bother trying that one :)), then the domain would be something like www.londonguide.com. See how easy it is to understand the name in the domain?
Now, if you choose a name such as London Travel Information Guide for Foreigners, it will look like this: www.londontravelinformationguideforforeigners.com. How long did it take you to make sense of that by just quickly glancing at the name? That’s too long … Even if your niche is providing travel information about London for foreign people, I’m sure you could come up with something shorter.
Besides, this would take much longer to rank well in online searches, so it’s bad for both visitors and robots (the little guys that read your page, also known as search engines).
If you have a longer name, like Family Travel Secrets, you could also try using dashes (-), like in our case: www.family-travel-secrets.com. However, I can confirm that it’s much better and easier to rank well when the whole domain name is together, without dashes. Our domain name was a choice we made, because we have another website using the same structure (www.tenerife-travel-secrets.com), so we decided to be consistent with that website.
You can also have another domain pointing to your main domain. For instance, we took the domain www.tenerifetravelsecrets.com, which is being redirected to www.tenerife-travel-secrets.com. Each additional domain might cost you about $10 per year, so it isn’t too expensive.
If you’re lucky, the domain of your choice will be available, but if not, try to vary the name slightly (for instance, tenerifesecrets.com).
How do you know if the domain of your choice is taken or not? You’ll find out when you register your domain through your host (step two below). For the moment just come up with 2 or 3 options that you like and then you can confirm if they are available or not later.
Another tip is that domains which end with .com rank much better than others, such as .net.
So, if you want to know in brief what the best things are to consider when deciding on your domain and name, this is what we think:
If you already have the domain you love – perfect! Let’s move on to the next step.
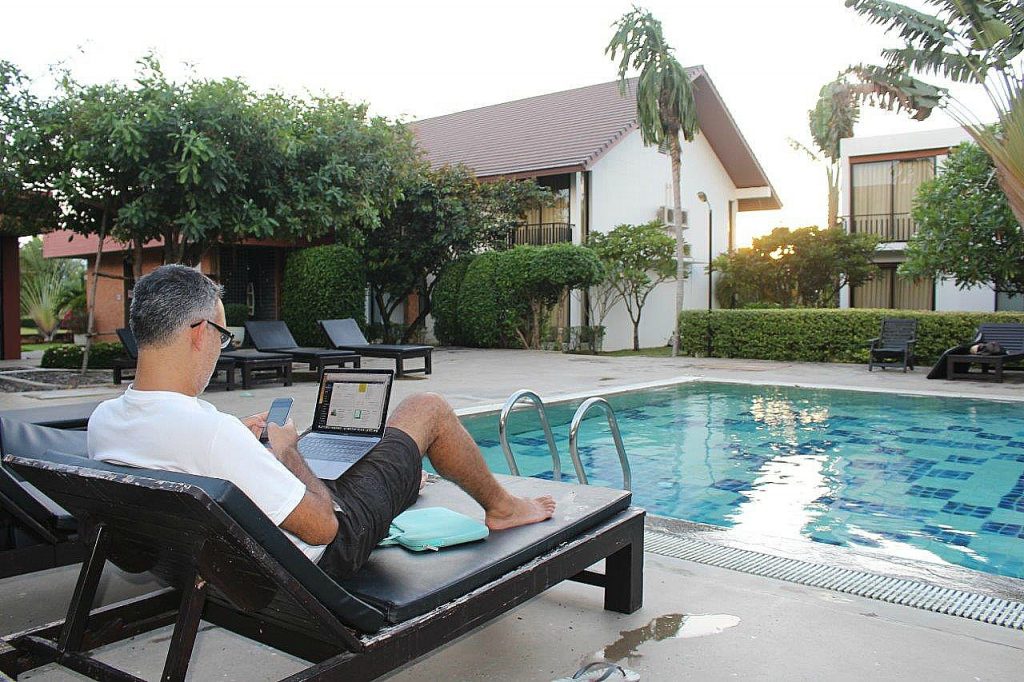
Now the fun starts. This is the real deal – you’re about to start a travel blog, to create your very personal travel blog, a place where you will be able to share your travel stories and be connected with the world. Exciting, isn’t it?
But before we move forward you need to understand what a web host is and why it is important. This is the foundation of your website, the whole structure in a house, giving you the ability to create layouts, e-mails, security, etc. In other words, it’s your entrance to the online world.
The web host will give you all the tools to store the content of your website, such as pages and posts. That means that if you don’t have a reliable web host, with all the safety measures that are so important nowadays, your website might be exposed to external threats (have you heard about hackers??). On a less dramatic level you could have to put up with some serious downtime, when the website won’t be accessible by your visitors, so I think you get the importance of a good web host.
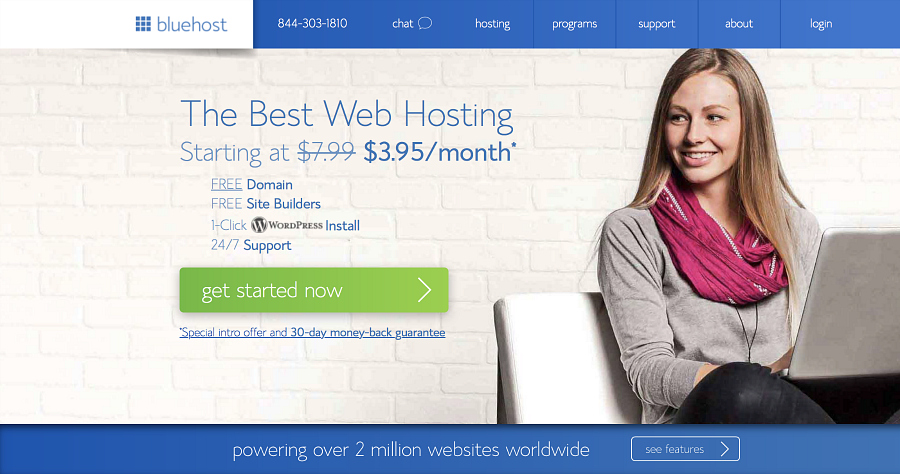
If you Google web host then you’ll find lots of options, and again you need to be very cautious about choosing the right one. We recommend the company Bluehost. They are the host we use for some of our websites and we couldn’t be more satisfied with them. We’ll create a separate article with all the pros and cons of using Bluehost as your host when you wish to start a travel blog in less than an hour, and compare them with some others, but here’s a brief overview of the benefits:
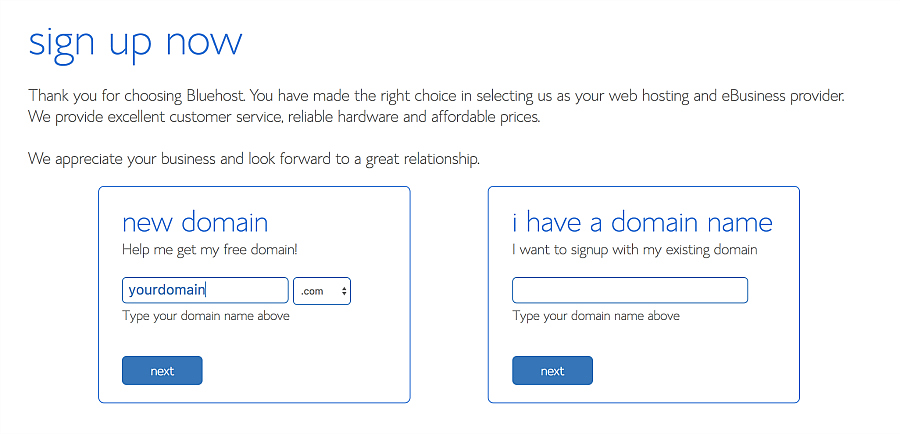
Once you click on the link for Bluehost you will be redirected to their website, where you’ll benefit from a discount for being a Family Travel Secrets visitor. So, click on this link to start the registration process and once you reach the home page of Bluehost just click on the green button saying “get started now“.
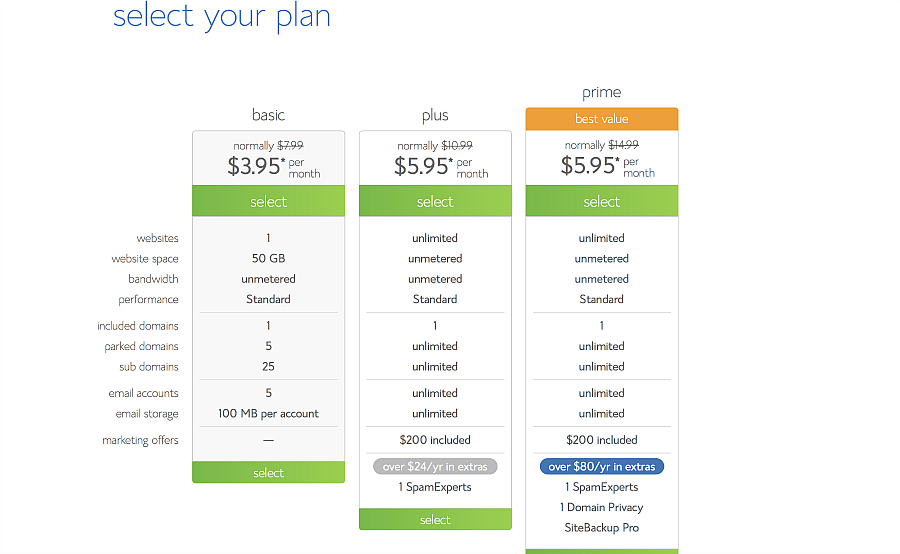
Next you’ll choose the plan that suits you – and your bank account – best. We recommend you choose the Basic Plan, which has everything that you need initially to start your travel blog in less than an hour. You’ll have enough space to store all your data (believe me, the 50GB storage you get on the basic plan is more than enough for a new blogger). You’ll also get 5 email addresses using the name of your business (for instance, one of our e-mail addresses is fabio@family-travel-secrets.com) and your domain for free. You’ll have the option to upgrade your plan in future if you want more space or more domains, for example.
Next you’ll be prompted to choose your domain. By now you should have your 2 or 3 options and know which is your top choice. Check if your favorite one is available, and if not try your next option, and so on;
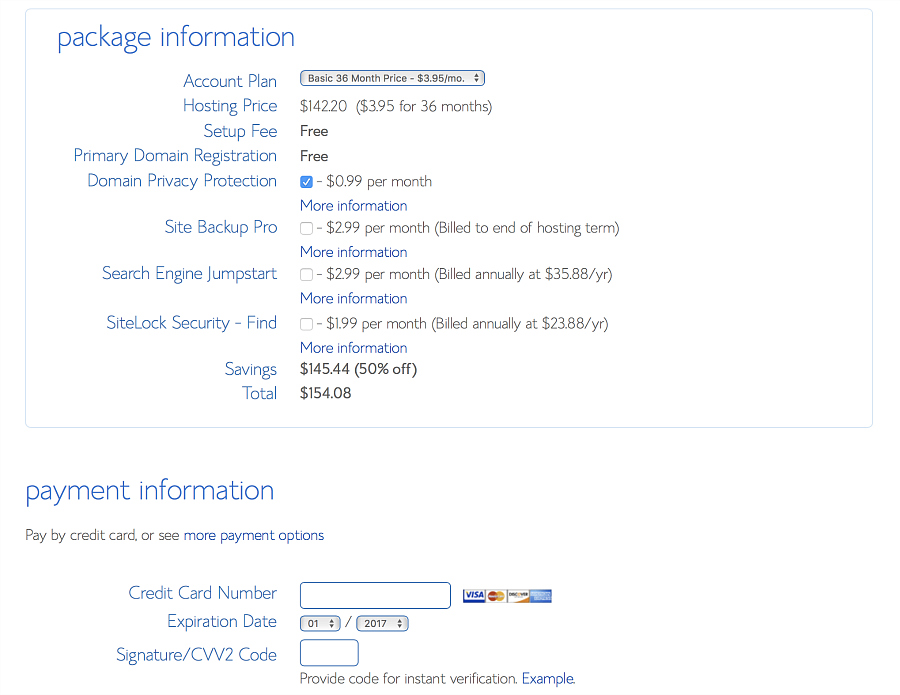
Now the bit that no one likes, but that is necessary: payment details :). With the discount you’ll get for being referred by us you won’t have to pay that much and you’ll get your business up and running today. If you select the 36-month option then you’ll save the most, as the total amount will be no more than US$142.20, meaning US$3.95/month. We also suggest paying an extra $0.99 per month for Domain Privacy, which we’ll explain in a moment. Once you pay you won’t need to pay anything else for web hosting for the next 3 years, unless you decide down the line to include some add-ons (Domain Privacy is the only one we suggest), although you really don’t need them for the moment. If the 36-month option is too much for you to begin with you could always try 12 months first. This will of course be cheaper up front, but more expensive when you consider the amount per month. If you want our recommendation you could start with one year, just like us – test your blogging abilities, see if you like it, and if you don’t it won’t be a huge investment. On top of that, in the first month you always have the 30-day money back guarantee to cover your back. It’s totally up to you. Include your credit card details, accept and you will receive a confirmation email about your registration.
![]()
Finally, on the “Welcome to Bluehost” screen you will be given the option to choose your password. Try to come up with something that isn’t too easy, but also something you’ll remember in the future. A mix of lowercase and capital letters, as well as symbols and numbers, will make it difficult for someone to hack your account. Just make sure you write it down and keep it safe in a place only you know (this is like your bank pin – very personal, and only you should know it. Write it somewhere only you have access to).
Congratulations! You now officially have an online business. To celebrate, drink a few sips of that delicious drink you chose and let’s move on to the next step.
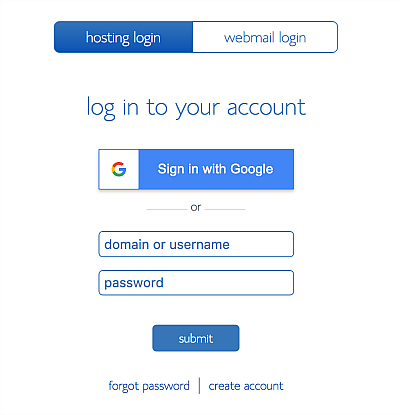
The address you’ll need to access your Bluehost account is https://my.bluehost.com/web-hosting/cplogin, and the screen below shows where you should include your access details.
WordPress is what they call a CMS application, and is the most widely-used one in the world. It is without any question the easiest one for managing your website and has a bunch of free stuff that will just make your blogging life easier once you start a travel blog.
Think of WordPress as the interface between you and your website. This is the place where you will create pages, posts, include plugins and visualize your website from the back end. WordPress is the middle man between you, your visitors and your web host. In other words, this is where the magic happens.
But just like creating your Bluehost account, installing WordPress will be extremely easy. In fact, nowadays every web host has a link in their admin area (or CPanel page) for installing WordPress easily. Bluehost is no different, and the screenshot below shows the button “Install WordPress” that you should click.
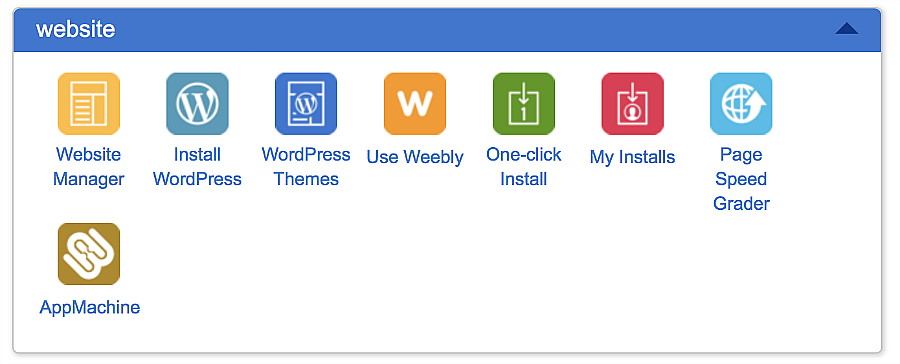
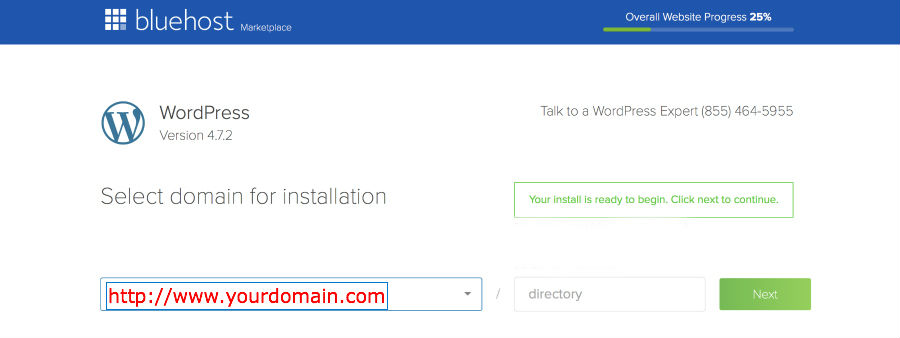
Just click on the button and you’ll be taken to the screen below to start a travel blog:
Click on “Get started”, select your domain from the dropdown menu, leave the directory blank and click on next:
Now create the name of your travel blog or website (ours is Family Travel Secrets), include the name of the admin responsible for your WordPress (I assume it will be you?), and include your email address and a password (it can be the same password that you used for Bluehost or a different one, but in any case, make sure you write it down and keep it safe). Check all 3 boxes that will appear and click on install to start a travel blog.
Leave WordPress to install on your Cpanel page and just wait. Once the installation is complete, you will see a confirmation screen that the installation was successful.
If you are then taken to a page offering you some paid add-ons, you can simply ignore them. You don’t need anything else now.
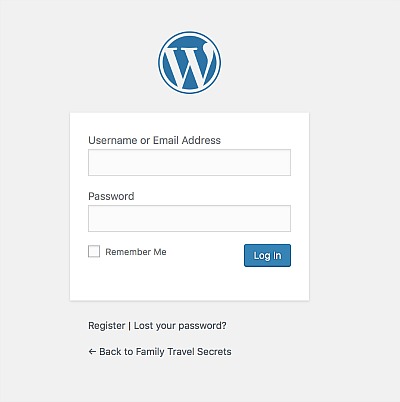
From now on, you can log on to WordPress to start creating your pages at the following address: http://www.yourdomain.com/wp-login.php (just make sure you replace “yourdomain” with the domain you chose). Enter your username and password on the screen below:
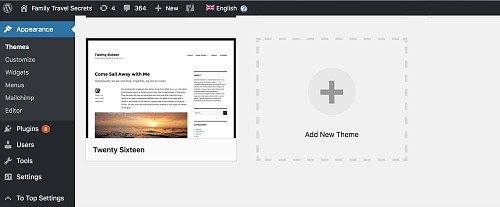
And now you have access to the WordPress Dashboard. WordPress simplifies your life by giving you a step-by-step guide to creating your travel blog or website.
You can follow that or choose to first go to the Appearance – Themes menu, in order to choose a layout for your website. Here you will see many, many options of themes that are available for free. There are several beautiful options, and as a beginner I’m sure you will find one to your taste.
To get a quick preview of the templates, hover your mouse over the layout and click on “Live Preview”. You will then be taken to the actual layout, as if it was a real website or blog.
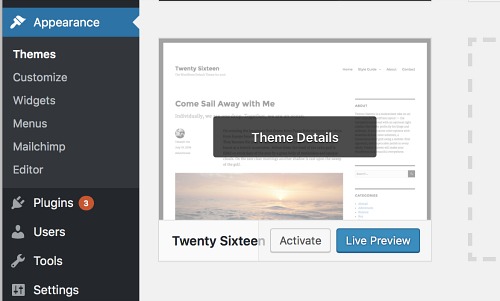
Click on the links, explore a bit and, when you find a layout that you like, just go back to WordPress and click on the “Install” button.
You can also purchase a theme in case you did not find one to your taste. The website theme forest has thousands of free and paid layouts, one better than the other.
The next step is to customize your travel blog a bit by changing colors, including your logo and your blog’s name, etc. This can be done in the Appearance – Customize menu. Again, explore the options a bit and don’t be afraid to start a travel blog. As long as you don’t save the changes you won’t make anything visibly different.
You will most likely go to create the first post or page of your very own travel blog.
You’ve come this far, so now is not the time to look back. One more step and you’ll finally have your first live page or post to share with your audience.
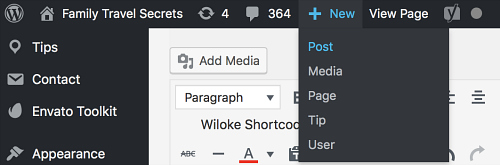
We can confirm that writing a blog post is much easier than you might imagine, and you don’t need to do a lot of things for your first post. Just start writing your ideas and put some pictures. To do that, you need to hover your mouse over the “New” menu, click on “Post” and there you have a box for entering the title and the box for description. This is also the place where you can include your media.
Then when you want to have a quick look before publishing, just click on “Preview”, and once you’re fine with the page, just publish it.
If you change your mind about anything you write or any picture you posted you can always go back to that post on WordPress and make some changes before updating.
You were great on your quest to start a travel blog in less than an hour, and with time you’ll learn more tricks and tips for your blog.
But remember, these are the five simple steps to creating a beautiful self-hosted blog in less than an hour, five steps to start a travel blog. That’s all you need for the moment, and once you have everything set up and your first stories are live, then you can start thinking about enhancing your travel blog.
There are lots of options out there, from different, more advanced layouts (such as in the website themeforest) and plugins to analysis of your traffic and SEO, social media, and the best ways to maintain your travel blog. We will cover some of them in separate posts with lots of tips and techniques.
Now that you’re hooked, just enjoy yourself and share your best stories with the world 🙂

We are travelers of the world - our story proves that. We are Fabio from Brazil, Ruth from Spain and Noah born in Belgium. We have had the opportunity to visit many places, mainly in Europe, and now we are doing a world tour as a family. Excited? If so, follow us during this amazing journey.